Winging Wet Flies - a Two-Fisted Approach
I've had more than a couple of requests to help out tiers with winging wet flies. I know from
personal experience how difficult they can be. As a teen I couldn't begin to do
them, and struggled as an adult as well. I had no less than four different tiers at
different times help me with these, and little by little they came, but not without
a fight. If you give up easily, wet fly wings may not be for you.
I finally settled on a method that incorporated some things I got from books, some methods
from the realm of full dress salmon fly tying, and some ideas from Don Bastian. Don
uses a two-handed method very similar to mine to tie a lot of his beautiful wet flies,
and this method is basically his, with some minor differences. I came up with this
on my own, independently of Don, but then got his video and saw that he has
used this method for years. So it is largely Don Bastian's winging method, and you can't
go too far wrong emulating Don Bastian.

Step One
Cut a slip from about the same point on two paired mallard secondary feathers, each feather coming from
opposite wings of the bird. Each slip should be about the width of the hook gap or a
bit smaller, but not less than 2/3 the gap. Pair them up, concave sides together
starting with the tips. Now look down on them and make sure that they don't curve
dramatically one way or the other. If they do, you may have culled slips from feathers
from the same wing, or you may have taken one slip from the bottom of one feather,
and one from the top of the other. The top slips will be stiffer than the ones
taken from the bottom of the feather. The slips need to be more or less matched for
stiffness and exactly matched for width. If your slips both curve in one direction
when you look at the tops, use other slips. There is no hope of these ever forming
a straight wing. You may, by the way, put the convex sides of the feathers together
and pair them up flaring out if you wish. J. Edson Leonard liked this method. I don't
personally remember flies being done like this, and I put the concave sides together as
is mentioned in Ray Bergman's "Trout". Both ways are acceptable.
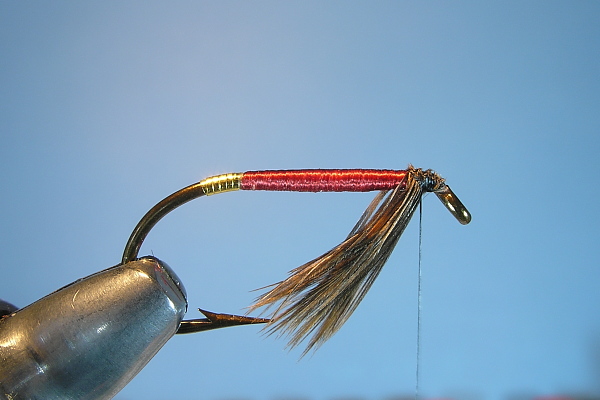
Step Two
Here I have a fly called the Herman Fly ready for winging. It's tied on a Mustad
#6 hook, and is quite large. I've wound the hackle
on this one, as opposed to using the false hackle technique that Don Bastian
espouses. Either method is fine, I've always wound the hackle. Be sure that you
leave a nice flat area on which to mount the wing, and try to not have too large
a floss bump where the body begins, as this will cock the wing up. The tips of the
hackle should extend to somewhere around the point of the hook.
Step Three
I've grasped the butts of the feathers in my right hand here, and am measuring them
for length against the shank. The tips should extend to about the end of the hook,
maybe a bit farther on some flies. I will tie this wing in with the long section of
the slips on top. It's all right to tie them in with the long slips on the bottom,
and many Canadian and Western wet flies were done this way.
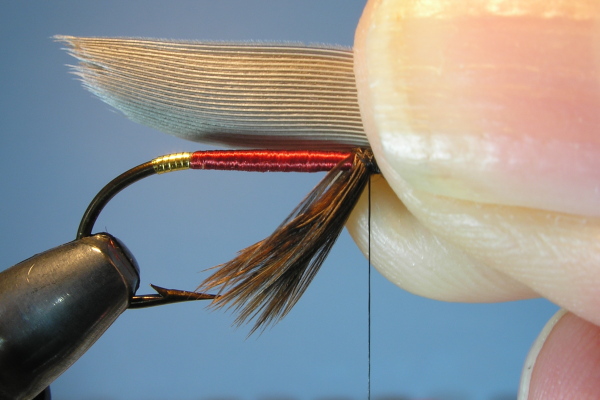
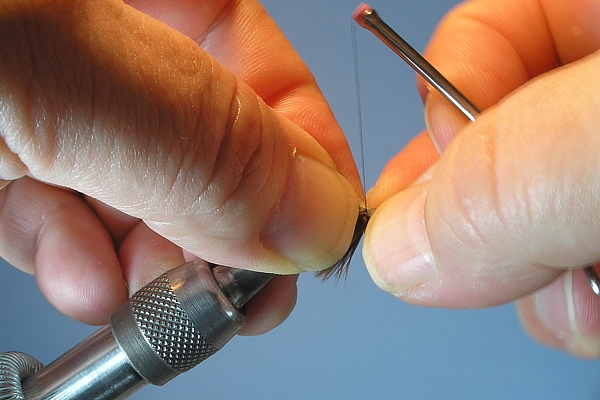
Step Four
Here I'm grasping the butts of the slips with my left hand, and at the same time
grasping the hook. I've got the slips ready to tie in now. I'm going to try to
tie these in right on top of the hook shank, straddling it with the two slips at the
very top of the shank.
Step Five
Here I've taken a very soft pinch loop around the butts, making sure there is
slack in my pinch. I don't want to gather or crush the butt fibers yet.

Step Six
Next I let the bobbin drop, STILL MAINTAINING MY PINCH. No fibers have been crushed
yet. At this point, I grab the butts with my right hand and cock them up a
bit, creasing the top of the slips. I never let go with my left hand, ever, throughout
this process. When I'm sure the feather is oriented just the way I'd like it to
ultimately be, and that my thread is just where I'd like it to be, I let go of the
pinch loop by briefly opening the fingers of my left hand. The weight of the bobbin will
gather the wing fibers together, crushing them straight down assuming you've maintained
your grasp with both hands.
Step Seven
In order to cinch the loop tight I came up with a method that still holds the slips
exactly in place with both hands, while tightening the loop. I grasp the butts with the
right hand thumb and middle fingers, and force the bobbin up using my index finger,
tightening the loop. You can also use the heel of your hand to raise the bobbin. In this way
you can tighten the loop while still stabilizing the slips, preventing them from
rolling or moving at all due to thread torque. Now repeat the whole process once more,
doing another pinch loop, another "gravity drop" with the bobbin, then cinching it
again by forcing the bobbin upwards, all the while holding on for dear life.
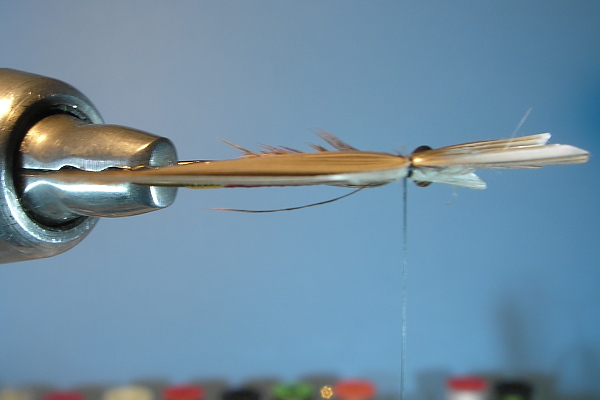
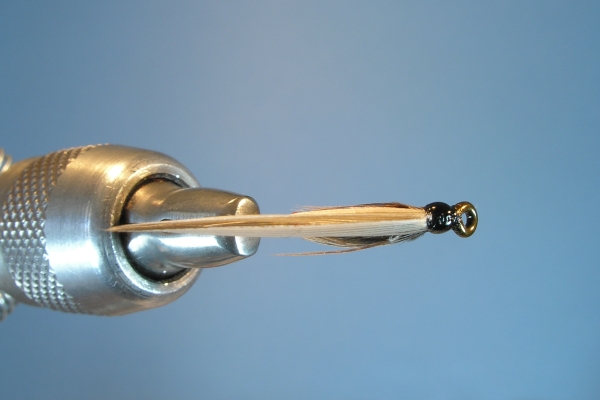
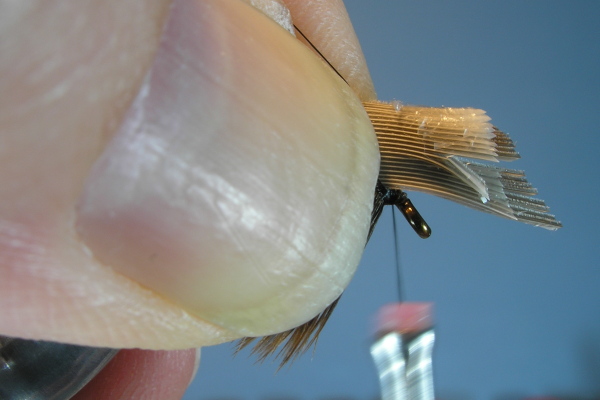
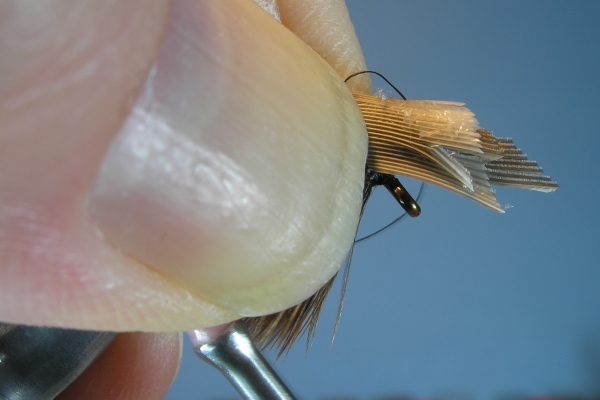
Step Eight
This may be the most important part of the process. After you've gotten the wing
in place with a couple of loops cinched up firmly, check and adjust everything by
looking down directly on top of the fly. It should look like the picture above. If
it doesn't, firmly tweak everything, using both hands, until it looks just like
this. You can see now that if your slips curved one way or the other before you
started this whole process, there would be no hope no matter what you did after the
fact. Once the wing is exactly the way you want it, make four more hard wraps, while
holding the wing firmly with your left hand.
Step Nine
Here is the fly after I've cut the butts on an angle, and wound the thread down
to the eye, binding them down, and back up, forming a head. I still hold the wing
firmly in place while doing this.
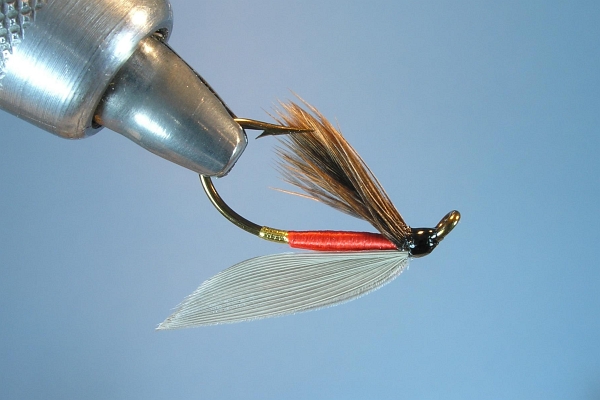
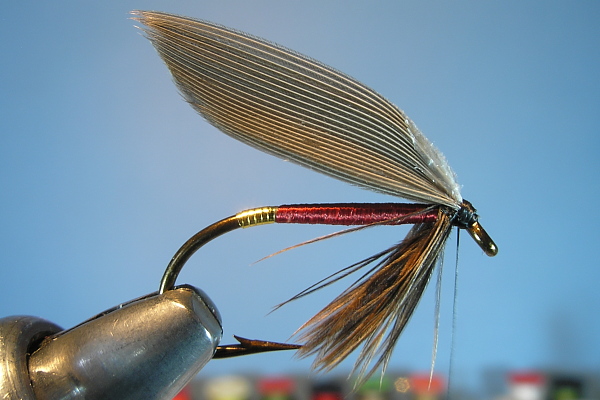
Step Ten
Here I've cut the thread after doing a whip finish, and then put on a coat of
Griff's thin and one of Sally Hanson's Hard as Nails. It was right at this point
that I decided I didn't like this fly at all. The top of the wing is blemished,
having to do with the fact that I had a camera in the way, and was taking pictures
all the while holding the wing in my left hand with a death grip as I moved things
around, etc. It's not a good excuse, but is the only one I have at hand. Anyway, I
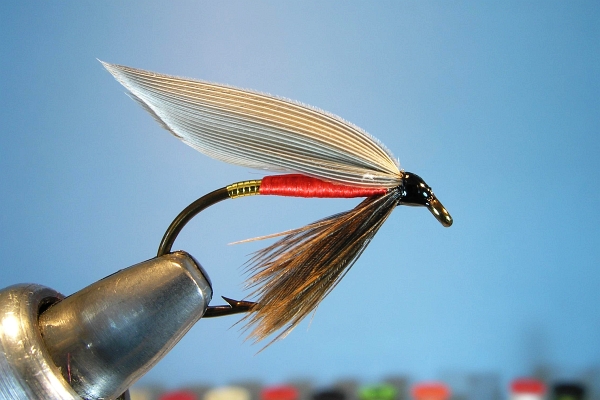
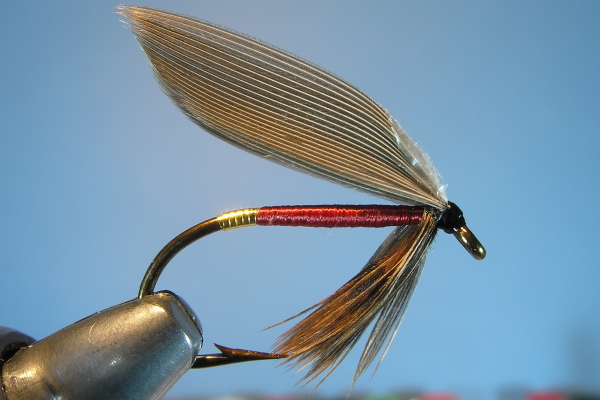
did another one, slimming the wing down as well as lowering it a bit. I wanted to
do a wide wing for the demo, but it turned out to be a little much. I also decided
that I wanted a more "scarlet" colored floss, rather than the darker red that
I had used. Below you'll see a more representative fly I think, one that I like
better anyway.
The head on this fly was given a coat of Griff's thin, two coats of Sally Hanson's
(Griff's thick or other thick high gloss head cement will work fine), and then a
coat of black lacquer.